

 中文简体
中文简体Cara Memasang Solenoid Valve: Jawaban Singkat
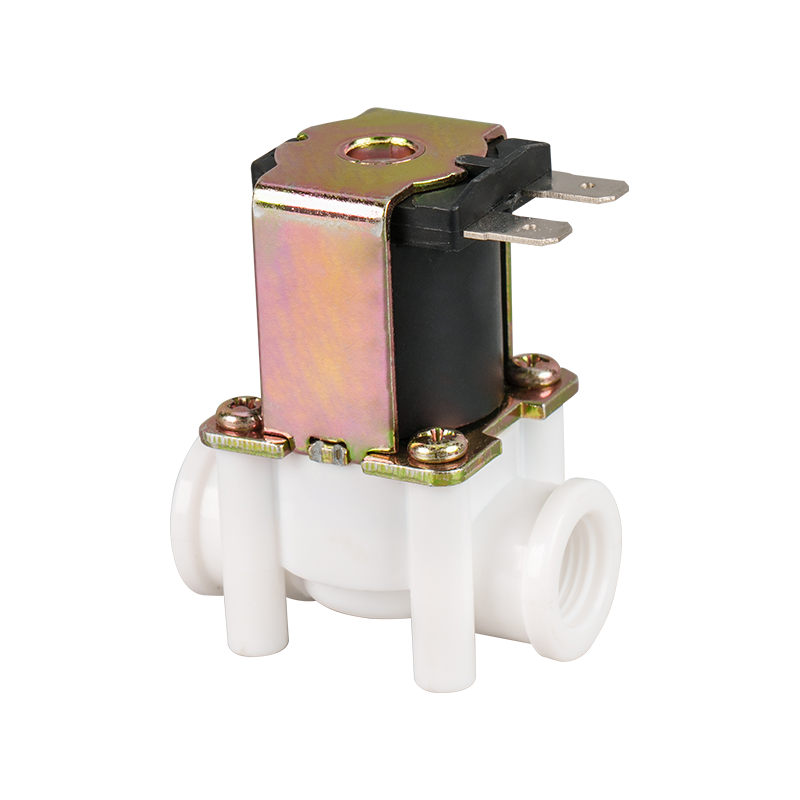
Memasang katup solenoid dengan benar terdiri dari lima hal: isolasi daya dan tekanan terlebih dahulu, sesuaikan panah arah aliran pada badan katup dengan arah aliran di pipa Anda, pasang kumparan menghadap ke atas bila memungkinkan, tutup sambungan berulir tanpa membiarkan sealant memasuki lubang katup, dan pastikan pasokan listrik sesuai dengan tegangan pengenal kumparan sebelum memberinya energi. Untuk a Katup Solenoid Percontohan khususnya, ada satu persyaratan tambahan yang tidak dimiliki oleh katup kerja langsung: sistem memerlukan perbedaan tekanan minimum antara saluran masuk dan saluran keluar — biasanya sekitar 0,35 hingga 0,5 bar — atau katup akan memberi energi tetapi gagal membuka dengan benar. Melewatkan pemeriksaan ini adalah satu-satunya alasan paling umum mengapa katup pilot dengan kabel yang benar tidak berfungsi.
Bagian di bawah ini menjelaskan urutan pemasangan secara lengkap, menjelaskan mengapa katup solenoid pilot berperilaku berbeda dari katup solenoid aksi langsung, dan membahas kesalahan yang paling banyak menyebabkan panggilan dukungan dan pengembalian.
Sebelum Anda Mulai: Pemeriksaan Pra-Instalasi
Sebagian besar kegagalan katup solenoid disebabkan oleh persiapan yang terlewat, bukan karena pemasangan fisik itu sendiri. Verifikasi beberapa menit di sini mencegah sebagian besar masalah comeback.
- Baca manual produk untuk model tertentu — katup yang dioperasikan pilot, kerja langsung, biasanya terbuka, dan biasanya tertutup, masing-masing memiliki kekhasan pemasangan berbeda yang perlu dikonfirmasi sebelum Anda mulai
- Periksa papan nama dengan voltase aktual sistem Anda, peringkat tekanan, dan ukuran pipa — ketidakcocokan di sini tidak terlihat sampai katup dihidupkan
- Isolasikan tekanan pasokan dan matikan daya listrik ke area pemasangan sepenuhnya
- Bersihkan pipa dari serpihan, sealant lama, atau serutan logam agar tidak terpotong, karena kontaminasi adalah penyebab utama kerusakan katup setelah pemasangan
- Lepaskan semua tutup pelindung pada port katup sebelum perakitan — tutup yang terlupakan akan menghalangi aliran sepenuhnya
Proses Instalasi Langkah demi Langkah
Setelah persiapan selesai, pemasangan fisik mengikuti urutan yang konsisten di sebagian besar jenis katup solenoid, baik sistem membawa air, udara, atau cairan lain yang kompatibel.
Langkah 1: Konfirmasikan Arah Aliran
Hampir setiap katup solenoid memiliki tanda panah yang dibentuk atau dicap pada badannya, terkadang dipasangkan dengan "1" untuk saluran masuk dan "2" untuk saluran keluar. Kebanyakan katup solenoid hanya berfungsi dengan benar pada satu arah aliran , dan memasangnya secara terbalik adalah salah satu dari sedikit kesalahan yang dapat mencegah katup bekerja sepenuhnya, meskipun segala sesuatu tentang pemasangannya terlihat benar.
Langkah 2: Posisikan Katup dengan Benar di Garis
Hindari memasang katup pada titik rendah, kemiringan, atau lekukan pada pipa karena sedimen dapat menempel pada dudukannya. Posisikan sedikit di atas bagian bawah tangki atau bejana yang terhubung daripada menggambar langsung dari titik terendah, dan pastikan ada jarak yang cukup di sekeliling bak untuk servis atau penggantian koil di masa mendatang.
Langkah 3: Arahkan Kumparan
Pasang katup sehingga kumparan solenoid menghadap ke atas kapan pun desain memungkinkan. Hal ini tidak sepenuhnya diperlukan agar katup dapat berfungsi — sebagian besar akan beroperasi dalam orientasi apa pun — tetapi kumparan yang tegak menjaga sedimen dan serpihan agar tidak mengendap di jangkar seiring waktu, sehingga memperpanjang masa pakai. Pemasangan horizontal umumnya dapat diterima jika pemasangan tegak tidak memungkinkan; tidak disarankan memasang kumparan menghadap ke bawah, karena orientasinya kemungkinan besar akan memerangkap serpihan pada bagian yang bergerak.
Langkah 4: Segel dan Hubungkan Perlengkapan Berulir
Oleskan pita PTFE atau penutup pipa yang sesuai pada sambungan berulir, lalu kencangkan dengan tangan sebelum menyelesaikannya dengan kunci pas sesuai torsi yang direkomendasikan pabrikan. Hindari menggunakan badan koil atau tabung katup itu sendiri sebagai tuas selama pengencangan — ini adalah penyebab umum kerusakan internal yang tidak terlihat sampai katup diberi tekanan. Berhati-hatilah agar selotip atau penyegel tidak merusak lubang katup, karena pecahan di sini sering menjadi penyebab "kebocoran misterius" yang muncul beberapa minggu setelah pemasangan yang tampak bersih.
Langkah 5: Pasang Coil
Konfirmasikan AC versus DC dan volume yang tepattage sebelum menghubungkan, dan groundkan katup sesuai dengan kode kelistrikan setempat. Periksa peringkat IP atau NEMA terhadap lingkungan pemasangan — lokasi luar ruangan atau basah memerlukan peringkat penutup yang sesuai dengan eksposur, bukan hanya peringkat yang terdengar memadai.
Langkah 6: Tekan Perlahan dan Uji
Berikan kembali tekanan secara bertahap, jangan sekaligus, dan uji kebocoran setiap sambungan sebelum mengembalikan sistem ke pengoperasian normal. Setelah uji tekanan selesai, berikan energi pada kumparan dan putar katup membuka dan menutup beberapa kali untuk memastikan katup merespons dengan benar pada tekanan pengoperasian sebenarnya, bukan hanya pada tekanan diam.
Mengapa Pilot Solenoid Valves Perlu Perhatian Khusus dalam Pemasangannya
Katup solenoid pilot — juga disebut dioperasikan pilot, dioperasikan servo, atau kerja tidak langsung — menggunakan mekanisme yang berbeda secara mendasar dari katup kerja langsung, dan perbedaan tersebut berdampak langsung pada tempat dan cara pemasangannya.
Bagaimana Mekanisme Percontohan Bekerja
Alih-alih kumparan menggerakkan segel utama secara langsung, katup solenoid pilot menggunakan diafragma dengan lubang pilot kecil yang memungkinkan cairan masuk mengisi ruang di atasnya. Ketika kumparan diberi energi, pendorong akan mengangkat dan membuka lubang pilot yang lebih besar, yang menguras ruang atas tersebut lebih cepat daripada yang dapat diisi ulang oleh lubang pilot kecil. Penurunan tekanan yang dihasilkan di atas diafragma, dikombinasikan dengan tekanan masuk yang lebih tinggi yang mendorong dari bawah, mengangkat diafragma dan membuka jalur aliran utama. — kumparan hanya perlu menggerakkan pendorong kecil, sedangkan tekanan saluran itu sendiri yang bekerja untuk membuka katup yang lebih besar.
Persyaratan Tekanan Diferensial Minimum
Karena mekanisme ini bergantung sepenuhnya pada perbedaan tekanan antara saluran masuk dan saluran keluar, katup solenoid pilot tidak dapat terbuka pada sistem yang tidak menyediakannya. Kebanyakan katup yang dioperasikan pilot memerlukan diferensial minimum sekitar 0,35 hingga 0,5 bar agar dapat berfungsi dengan andal , meskipun angka pastinya bervariasi berdasarkan ukuran dan konstruksi katup. Inilah sebabnya mengapa katup pilot yang dipasang pada jalur umpan gravitasi, tangki pembuangan dengan head rendah, atau pengaturan tekanan mendekati nol dapat dihubungkan dengan benar, diberi energi sesuai perintah, dan masih menolak untuk membuka — katup tidak rusak, pemasangannya tidak memenuhi persyaratan pengoperasiannya.
| Faktor | Dioperasikan Pilot | Akting Langsung |
|---|---|---|
| Diperlukan tekanan minimum | ~0,35 – diferensial 0,5 bar | Tidak ada; bekerja pada diferensial nol |
| Cocok untuk sistem yang diberi makan gravitasi | Tidak, kecuali tekanan telah dikonfirmasi | Ya |
| Konsumsi daya | Lebih rendah, tekanan saluran membantu pembukaan | Lebih tinggi, koil melakukan semua pekerjaan |
| Paling cocok untuk | Ukuran lubang lebih besar, laju aliran lebih tinggi | Lubang lebih kecil, garis tekanan rendah atau nol |
Sebelum memasang katup solenoid pilot, pastikan tekanan diferensial aktual yang akan diberikan oleh lokasi pemasangan, bukan hanya tekanan suplai statis — sistem dapat menunjukkan tekanan yang memadai pada sumbernya namun tetap memberikan perbedaan yang terlalu kecil pada titik pemasangan katup, terutama di bagian hilir dari pembatasan lain atau dalam jangka panjang.
Kesalahan Instalasi Umum yang Harus Dihindari
Sebagian besar masalah katup solenoid yang dilaporkan setelah pemasangan berasal dari daftar kesalahan yang singkat dan berulang. Memeriksa daftar ini sebelum menjalankan sistem akan menangkap sebagian besar dari mereka.
- Memasang katup ke belakang berlawanan dengan panah arah aliran
- Memasang katup yang dioperasikan pilot pada sistem tanpa memastikannya memenuhi persyaratan tekanan diferensial minimum
- Meninggalkan penutup ulir atau serpihan yang terkoyak ke dalam lubang katup selama penyambungan
- Menggunakan kumparan atau badan katup sebagai titik pengungkit kunci pas selama pengencangan
- Pemasangan koil menghadap ke bawah, yang seiring waktu mengundang serpihan ke dalam jangkar
- Ketidaksesuaian tegangan pengenal koil atau tipe AC/DC dengan pasokan listrik sebenarnya
- Melewatkan uji kebocoran sebelum mengembalikan sistem ke tekanan pengoperasian penuh
- Membiarkan kumparan terus diberi energi dalam jangka waktu lama, akan memperpendek masa pakai kumparan dan dapat menyebabkannya menjadi terlalu panas atau terbakar
Jika media dalam saluran membawa debu, kerak, atau partikulat, pasang filter dengan saringan minimal 60 mesh di bagian hulu katup — kotoran tanpa filter yang menghalangi lubang pilot atau lubang utama adalah penyebab umum pengoperasian yang tidak menentu atau terputus-putus yang terlihat seperti masalah kabel atau tekanan.